.png)
Overview
OIC Projects and Integrations can be easily imported into your catalog to build a complete and organized view of your OIC assets and all their corresponding metadata and documentation. Once your OIC API Catalog is populated, you can start to prioritize reuse by promoting Integrations to the Consumer Portal, driving efficiency and speeding innovation.
Key Features
-
Import Projects and Integrations from OIC
-
Search Catalog for Projects in Integrations
-
Reporting on Catalog content
-
Publish SOAP and REST Integrations to Consumer Portal
Getting Started
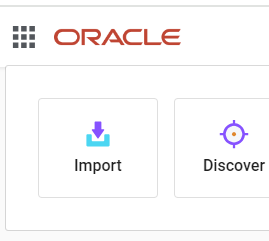
The OIC import functionality can be accessed either from the Catalog homepage or from the drop down navigation menu in the catalog header.
Prerequisites
Your catalog must be connected to your OIC environment to be able to import Projects their corresponding Integrations. Please see Connect Your System to OIC for more details
Access
This functionality is available via the OIC catalog UI.
How to Use
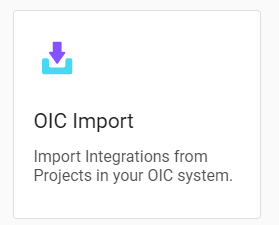
To open up the import functionality, click the import button on the homepage or navigational menu, then click OIC import.
Select a project from import screen by clicking on it.
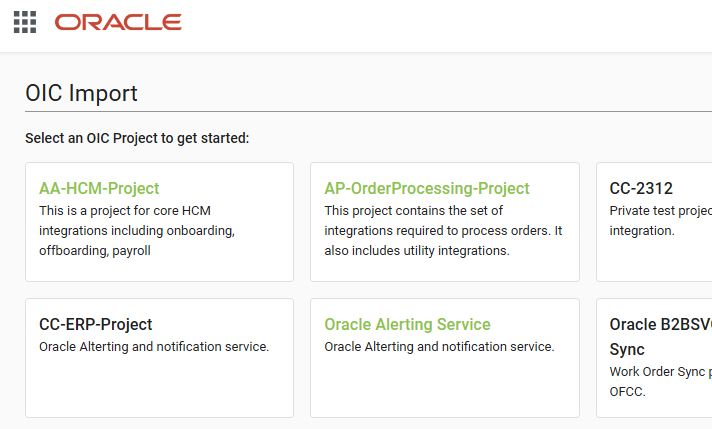
Projects that exist in the catalog, i.e. that have some or all of their integrations imported into the system, will have their name highlighted in green as shown.
The Project’s details and all its corresponding Integrations will be displayed on the page, including tabs for REST, SOAP, Event, and Scheduled Integrations. On the left is the OIC status and details and on the right is the ignite status i.e. the status of anything that’s already been imported into your OIC catalog. You can view further details using the v button next to the Integration state field on the OIC status side.
The import screen has the following areas:
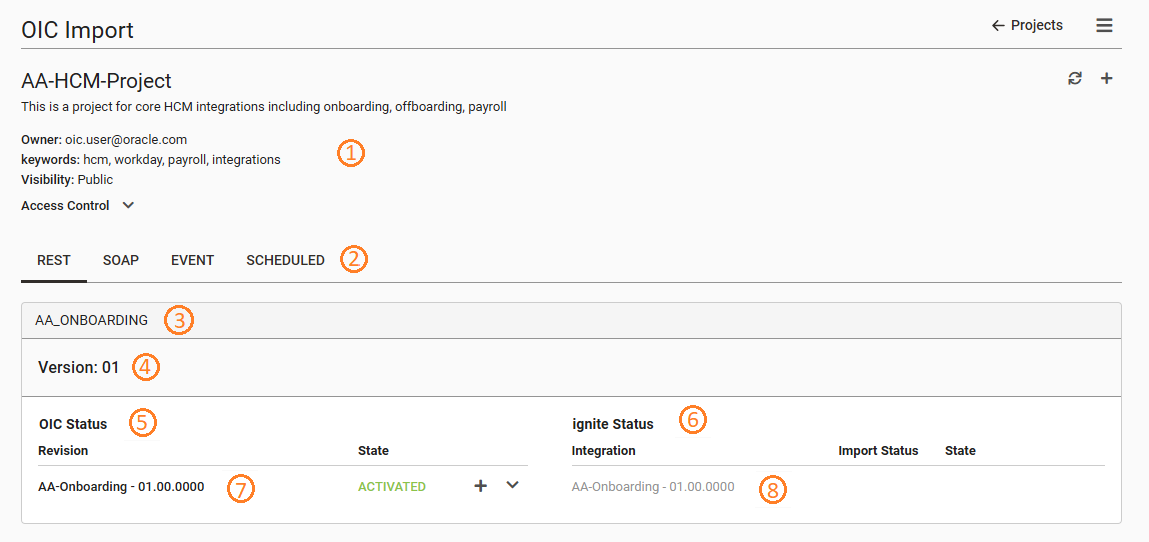
They signify the following information:
-
OIC Project details - List the Project name and description and additional details such as the owner, keywords and accessibility in OIC.
-
Integration type tab sections - Integrations are grouped by type that can be accessed by clicking on the associated tab.
-
Integration group - a section that groups all OIC Integrations that share the same code.
-
Major version group - within an Integration Group contains a section that groups all Integrations that share the same major version.
-
OIC Integration versions - a section within a major version group that contains all minor version Integrations for that group.
-
ignite integration versions - a section that contains the catalog integration version for the OIC Integration versions. There will be an catalog entry for each OIC minor version.
-
OIC integration name and status - List the OIC Integration name, (minor) version and current status in OIC. You can view further details using the

-
ignite integration name and status - associated to with the OIC Integration to its left, will show the status of the Integration in your catalog. If greyed out, as is shown above, the Integration currently does not exist in the system.
Importing a Project into the Catalog
You have the option to import all Integrations in the Project through one action, or to choose individual Integrations to import.
To import all Integrations for a Project, click the + icon to the top right of the page.
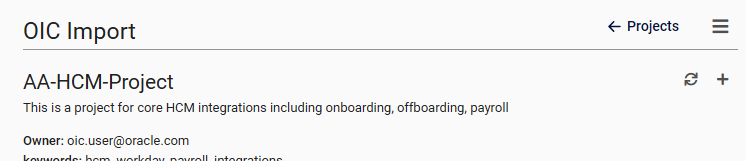
This could take some time, depending on the number of Integrations the Project contains. Click the 
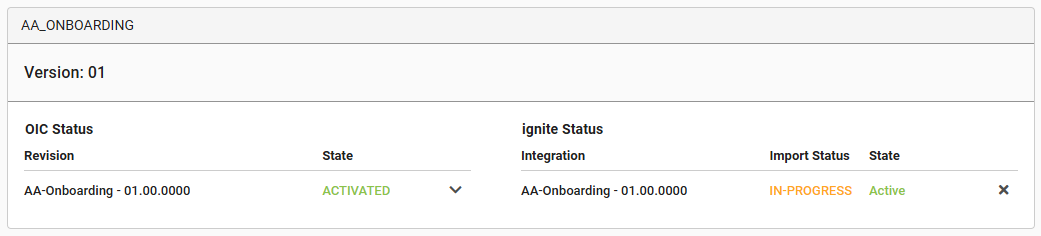
and once completed will look as follows.
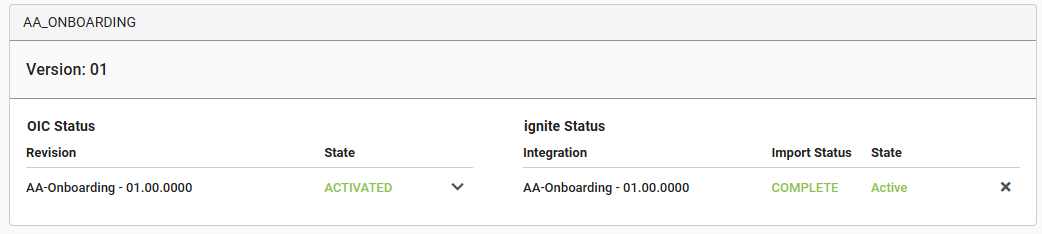
Importing individual Integrations into the Catalog
Instead of importing an entire Project and all its Integrations into the catalog, it is also possible to import individual integrations separately. Simply click the 
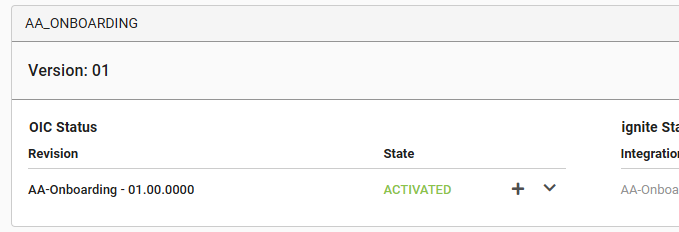
This will create a Project in the catalog, if one did not yet exist for it, and import the Integration.
Note that once you have imported an individual Integration into the catalog, you can no longer import the entire Project through a single action.
If an integration failed to import into ignite, its workflow status will be listed as ERROR.
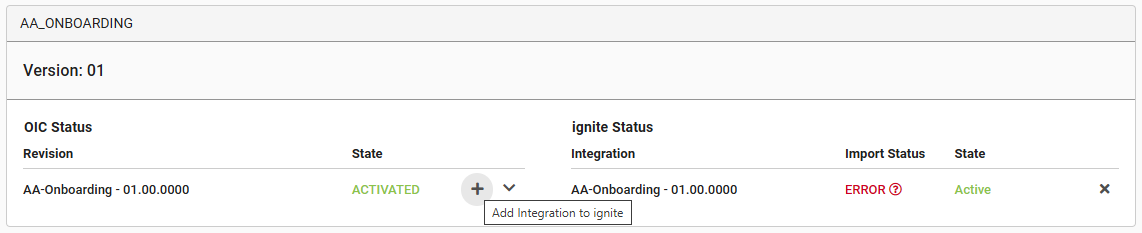
When that happens, you can retry the import by clicking the
Updating OIC Integrations
When changes are made to Integrations in OIC their catalog counterparts may end up out of date and user will want those changes to be applied to keep OIC and the catalog in sync. There are two main changes to Integrations in OIC that can cause this scenario.
Change to the Integration versions status
When, in an OIC Project a new minor version is Activated the previously Activated version will revert to Configured. Since your catalog keeps track of this information, the change will cause the record to be out of date.
On the import screen this will manifest itself by two integrations states as shown in orange.
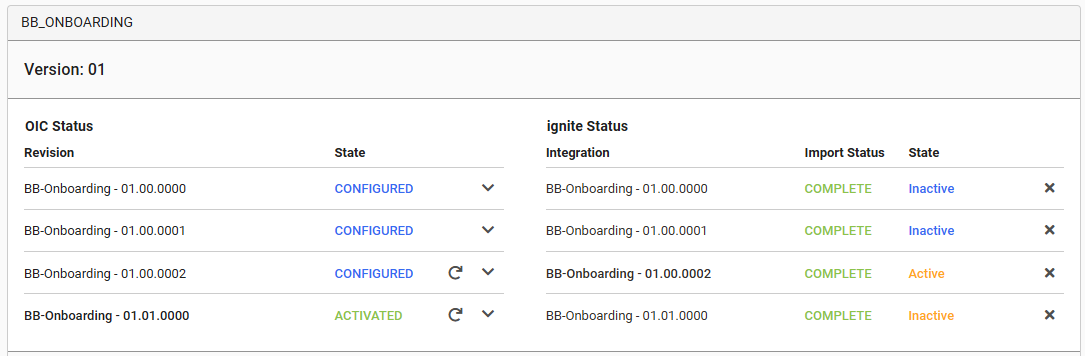
Click the 
Changes to an Integration
OIC Integration properties such as updates to the description, keywords or the associated OpenAPI specification are reflected in the catalog and changes to them will result in the ignite Integration being out of date.
When this happens, the Import Status for the Integration on the import screen will be shown as OUTDATED in orange.
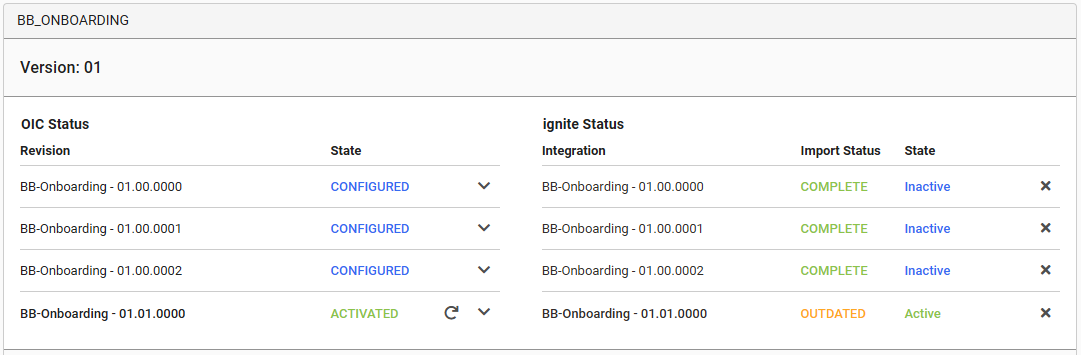
Click the
Deleting Integrations
When doing a full import of an OIC Project, there may be some integrations that are not needed in the catalog.
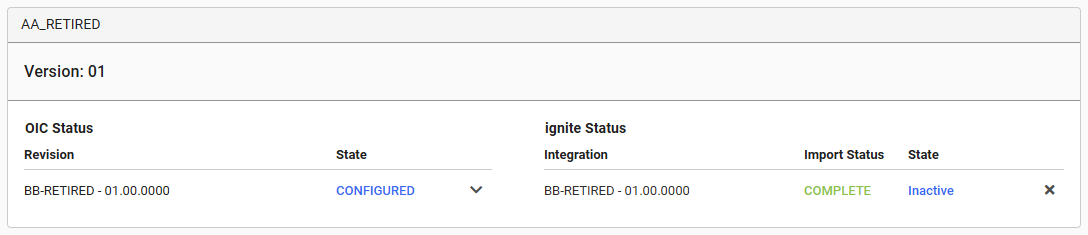
Click the 
In addition to the above scenario, it may be the case that an Integration was removed from OIC after it was imported into the catalog. Such an entry will still be listed on the import screen and have the OIC name greyed out while still showing the ignite Integration.
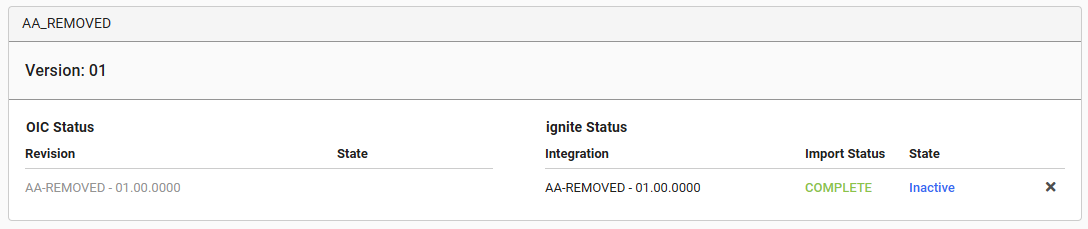
If the Integration is no longer required in the catalog, simply click the
It is not possible to undo a delete, but if the Integration still exists in OIC, it can be re-imported at any time.
Automatic OIC synchronization
Rather than keeping your catalog up to date with the integrations in OIC, it is recommended to enable the automatic OIC synchronization instead. For each project, this will enable the catalog to be automatically kept up to date with integrations in OIC that are added, updated and/or deleted. It can be enabled separately for each of these changes, so it is possible to synchronize only additions and updates, but not deletions.
This setting can only be applied to Projects that already exist in the catalog, so typically users would start by importing the entire project and then apply the required synchronization settings.
To switch on Automatic synchronization, first open a Project from the Project list that you want to apply the setting for. Then click on the 
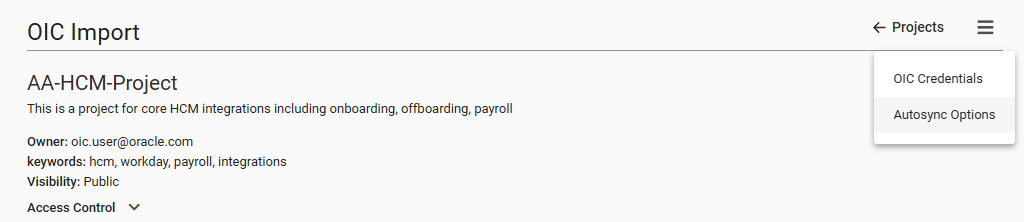
Then select the types of OIC updates you want to synchronize automatically into the catalog.
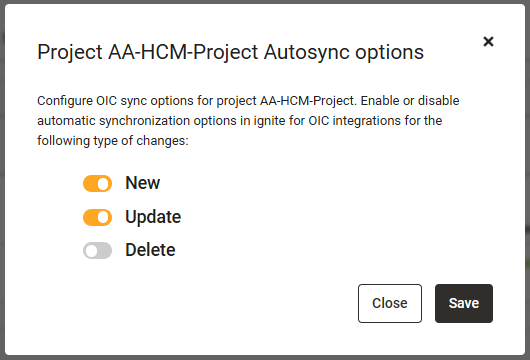
The options concern the following types of changes:
-
New - Any Integrations that are added to the OIC Project are automatically added to the catalog.
-
Update - Any updates made to existing OIC Integrations are automatically applied to their catalog counterpart.
-
Delete - Any Integrations that are deleted from the OIC Project are automatically removed from your catalog.
When automatic synchronization is enabled for a project, the selected option are show in the Project summary section.
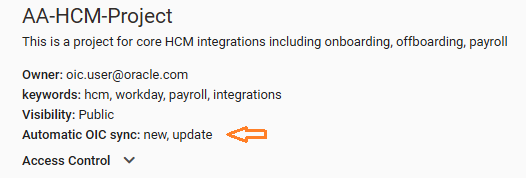
Note that for synchronization options that are enabled, their manual counterparts in the UI will be disabled. For example, if automatic update is enabled, the manual update option in the UI will no longer be available.
Additional Resources
Conclusion
Importing Projects and Integrations into your OIC API Catalog is quick and easy, providing you a complete and organized view of all assets and a starting point to promote Integrations for more consumption.