.png)
Overview
Your OIC environment’s IAM domain can be coupled to your OIC API Catalog so that users can access the portal using their existing OIC user details.
Getting Started
This documentation covers connecting SSO to the API Catalog component of your ignite system.
Setup of Keycloak as client or application in Oracle Identity Cloud Service / IAM Domain
Log in to Oracle Cloud with a user who has enough privileges to set up the Identity Cloud Service or the newer IAM Domain designation, e.g. as an administrator of your cloud tenant. Then switch to the "Identity Domain" section. In the new interface for IAM domains, click "Identity -> Domains -> Default Domain"
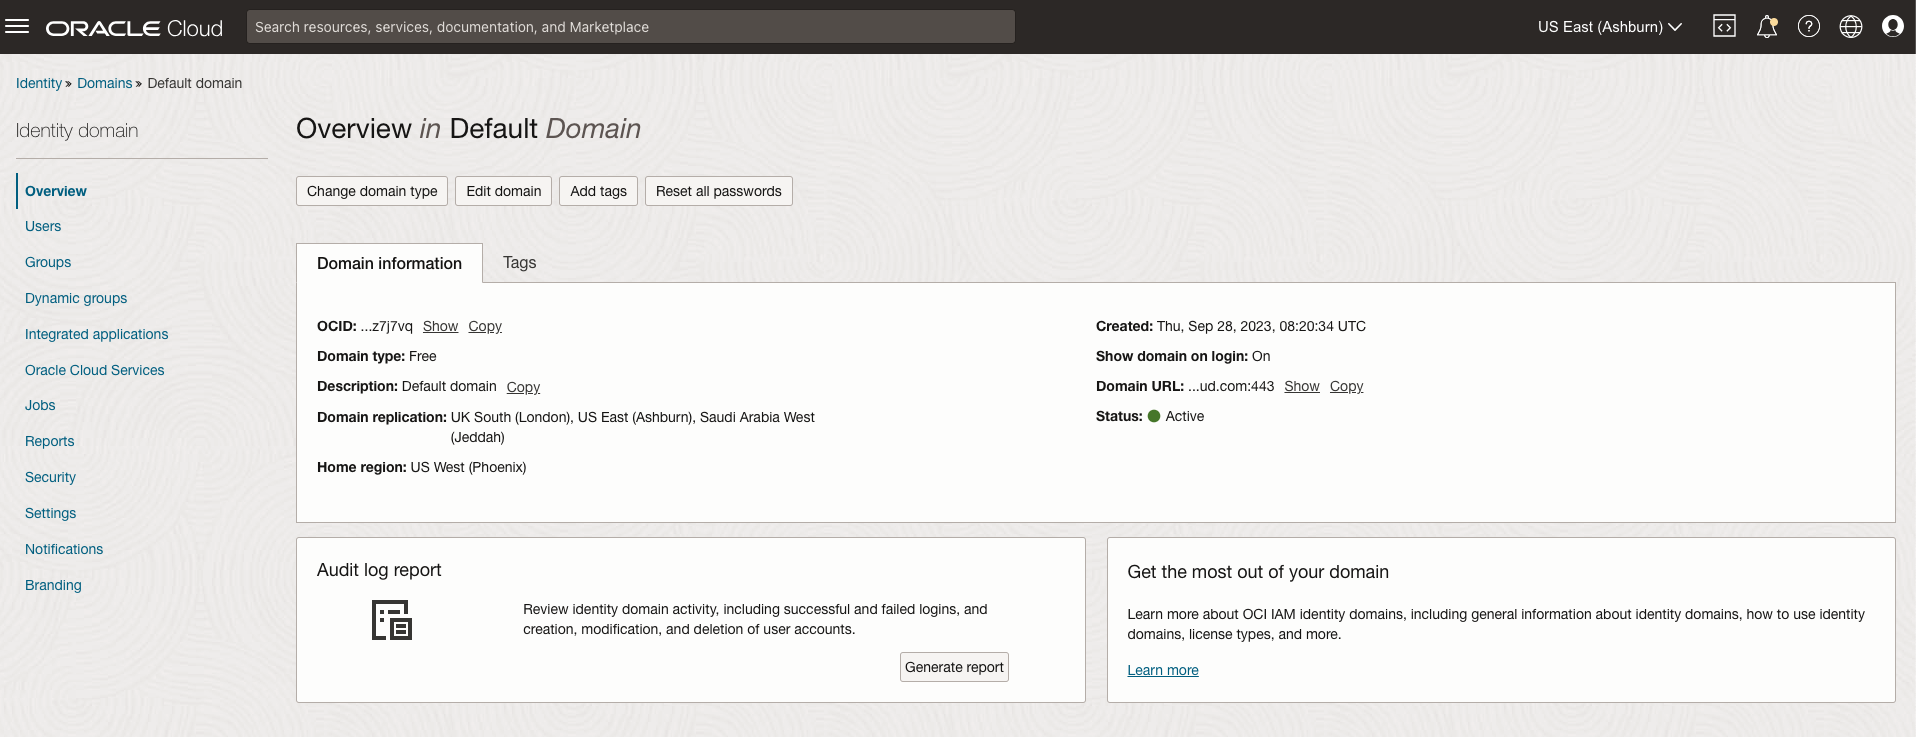
Now click on the “Integrated Applications” from the list on the left
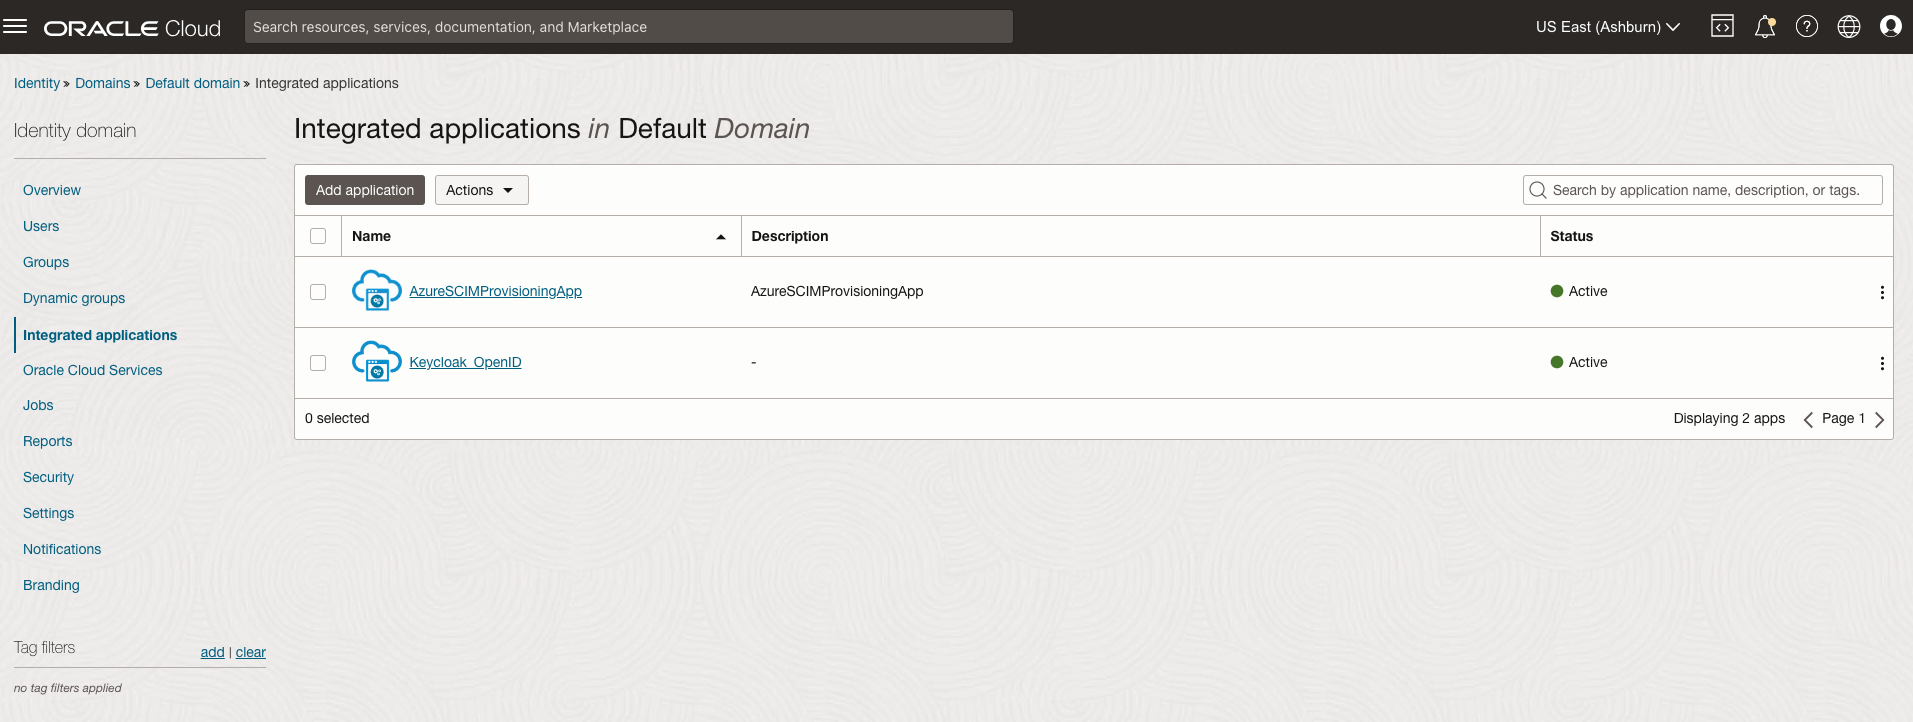
Now click on the "+ Add Application" link , select “Confidential Application” from the list and click on “Launch Workflow”

Give the application a name, e.g. "IgniteForOICApp" and, optionally add a description and icon. Leave all other fields empty for the time being and select "Next" at the bottom.
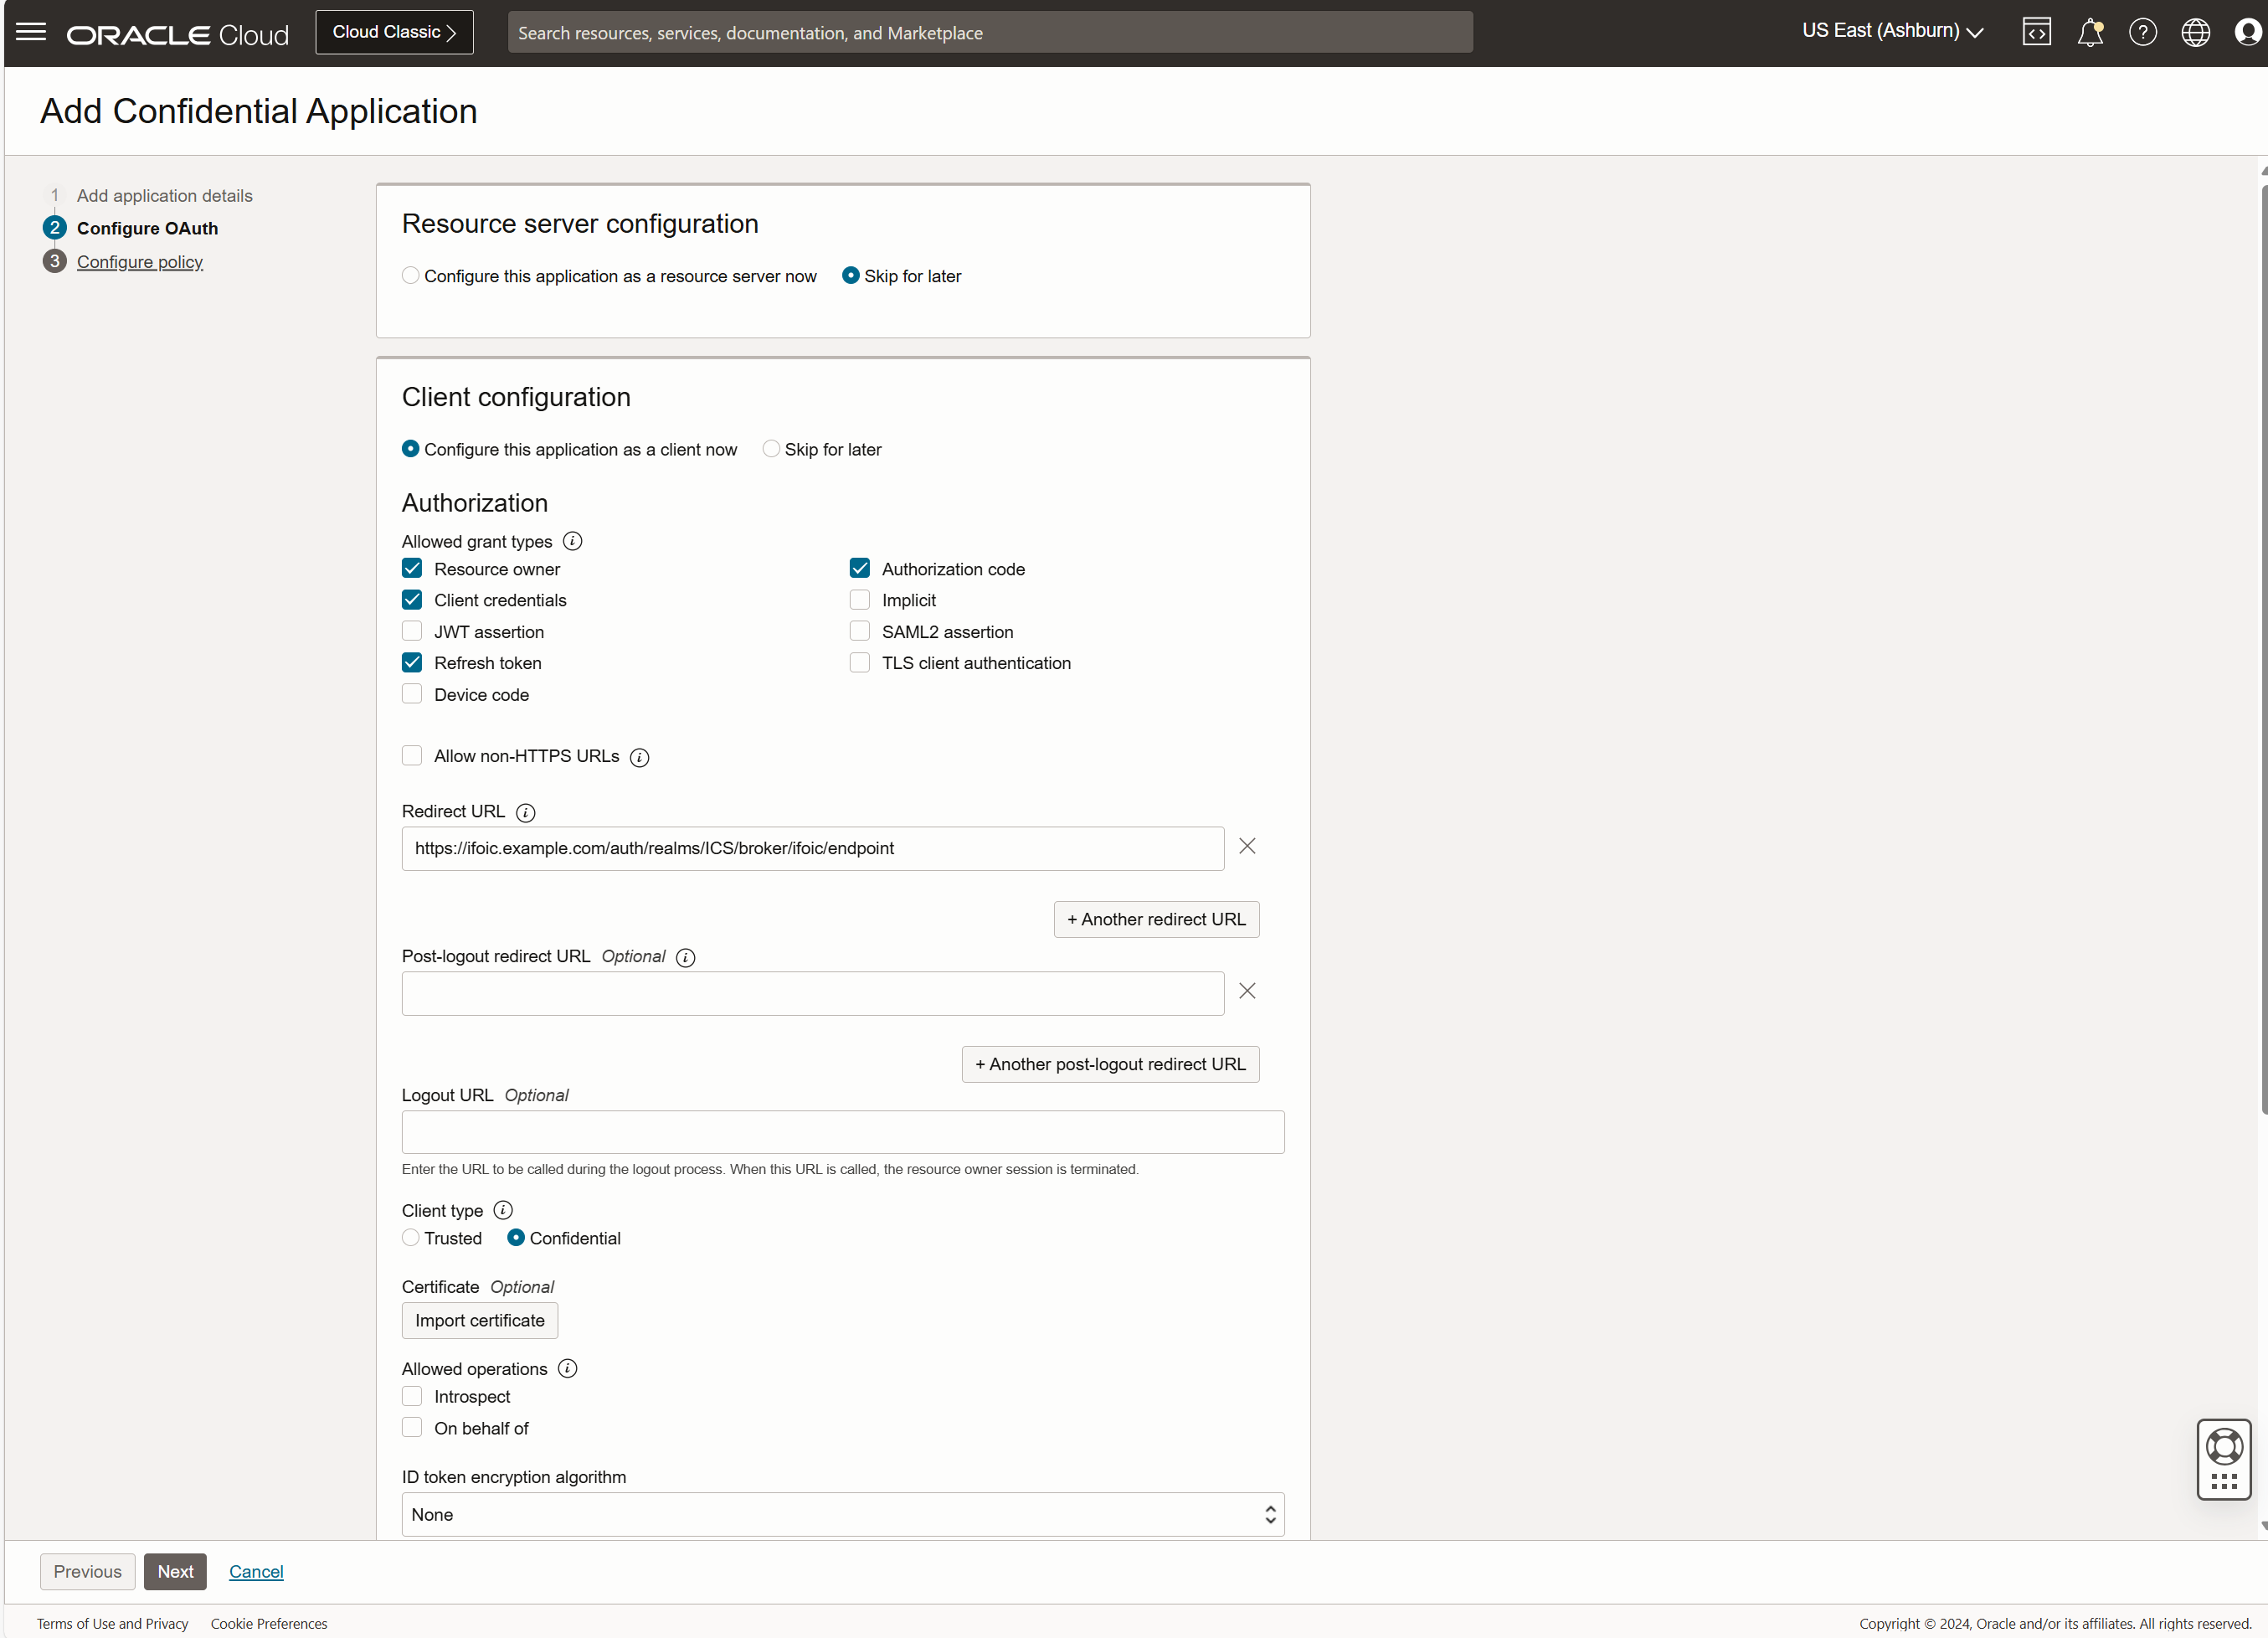
Select “Client configuration” and setup as below
-
Under Authorization select "Client Credentials", "Authorization Code" “Resource Owner”, and “Refresh Token”. See screenshot below.
-
Fill in the “Redirect URL” field with the following value https://hostname/auth/realms/ICS/broker/ifoic/endpoint. Replace hostname with your OIC API Catalog and Portal hostname.
The value “ifoic” can vary but if you change it you must use the same value later when setting up keycloak.
-
Select "Confidential" as client type.
-
Select "Anywhere" for "Allowed Client IP Address".
-
Leave all other entries at default.
-
Click on the "Next" button on the Bottom.
-
For “Web Tier Policy” select “skip and do later”
-
Click “Finish” a client ID and a client secret will be created for you. Make a copy of this value so it can be used in subsequent steps.
-
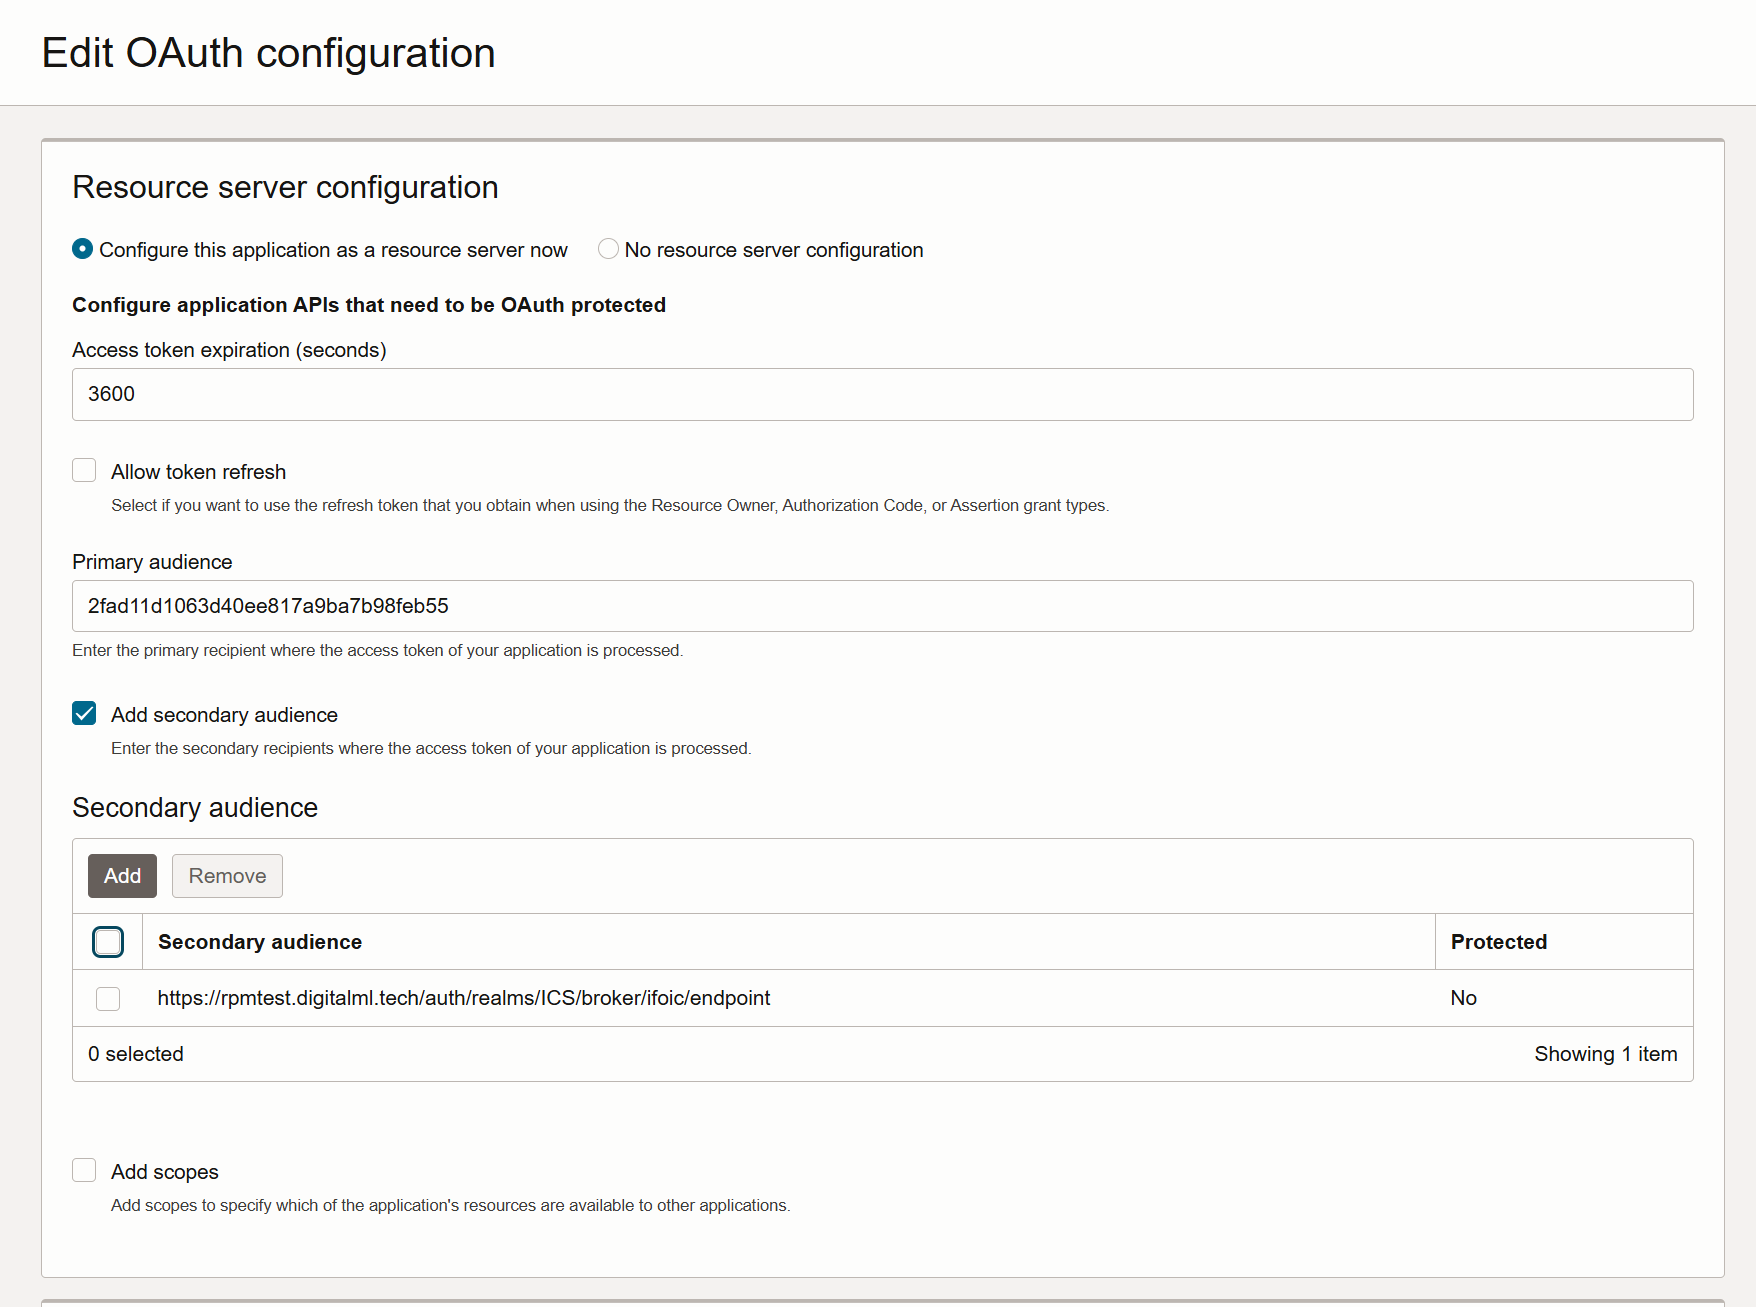
Now click on “Edit Oauth configuration” and at the top select “Configure this application as a resource server now”
-
Primary audience will be Client ID you just copied.
-
Select “Add secondary audience” and use the same URL as for the Redirect URL:
https://hostname/auth/realms/ICS/broker/ifoic/endpoint. Remember to replace the hostname with the correct value.
The value “ifoic” can vary but if you change it you must use the same value later when setting up keycloak.
-
Optionally, select whether an auto-refresh of the token should be possible and change how long the token should be valid.
-
Save Changes
Next, click “Activate” to enable the application.
Public access to the certificates used by IDCS is required. To enable this, navigate to the identity domain page, then click on "Settings" , and activate the checkbox "Configure Client Access"
The IDCS/IAM domain part of the configuration should now be complete and working.
Set up the IDCS/ IAM domain as an identity provider in Keycloak.
Log into your Keycloak installation as the user "keycloak" using the password entered as part of the initial creation of your OIC API Catalog and Portal.
Select the ICS realm from the dropdown on the top left (this is the realm for the Catalog)
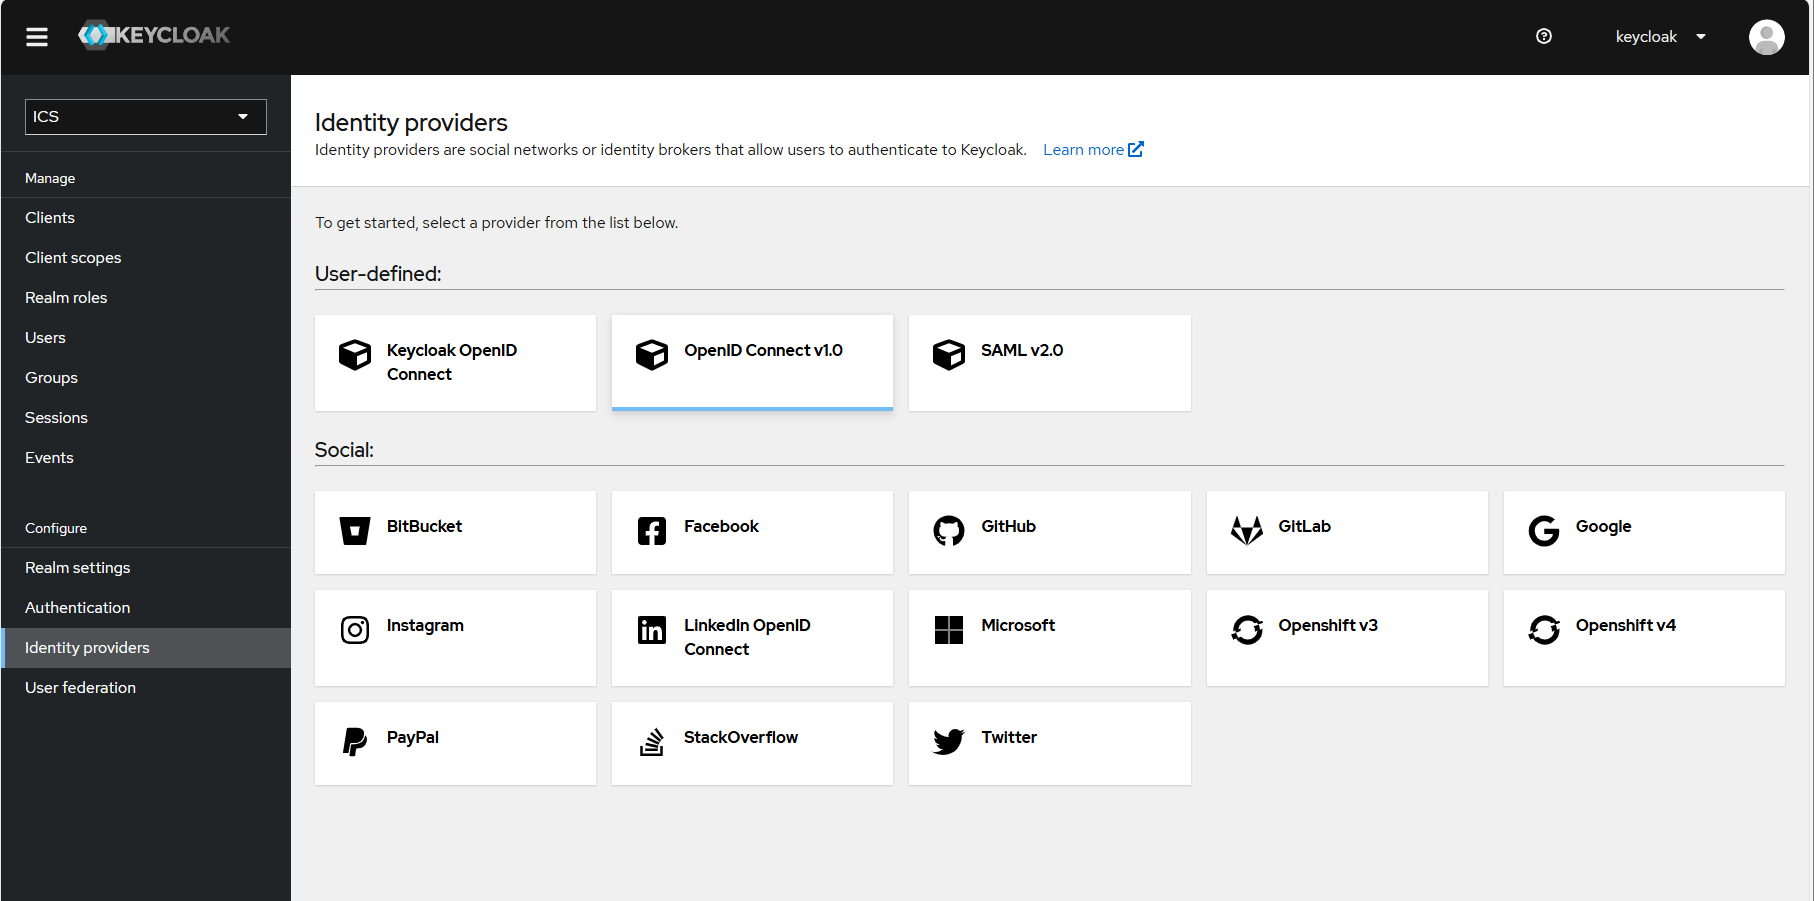
In your selected realm, click on "Identity Providers" on the left, then add a new "OpenId Connect v1.0".
-
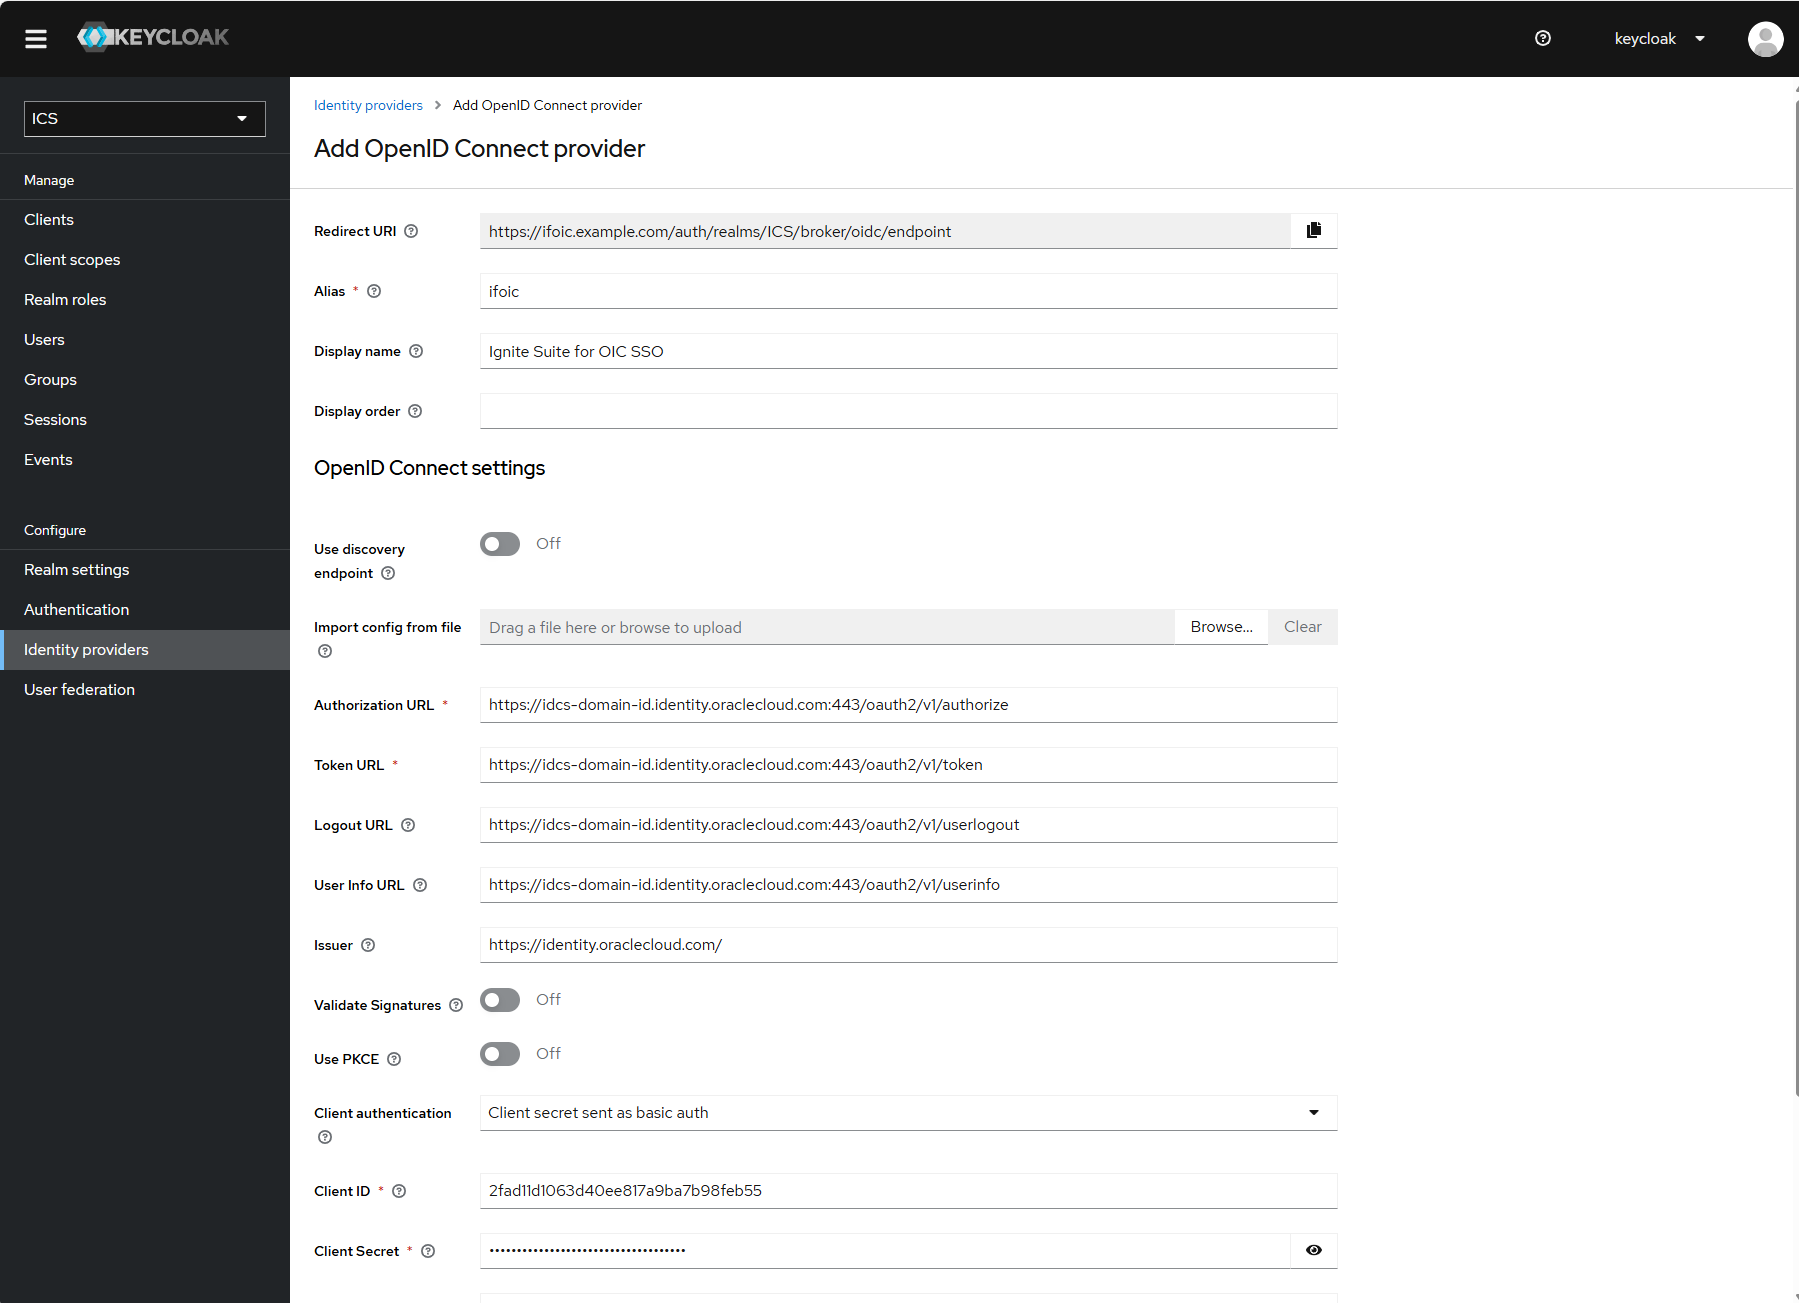
Give the provider the alias "ifoic".
If you used a different value in the “Redirect URL” when configuring the client on OCI you must use that value here as the alias.
-
Fill in a value for “Display name”. This is what will be displayed in the button on the login page for your OIC API Catalog.
-
Disable the “Use Discovery Endpoint” option.
-
You need to fill in the four URL values. These are formed using the Domain URL which can be found on the Overview page for your IDCS instance and adding a suffix:
-
For “Authorization URL”: /oauth2/v1/authorize
-
For “Token URL”: /oauth2/v1/token
-
For “Logout URL”: /oauth2/v1/userlogout
-
For “User Info URL”: /oauth2/v1/userinfo
-
-
The “Issuer” must be https://identity.oraclecloud.com/ including the trailing slash.
-
For “Client Authentication” select "Client Secret sent as Basic Auth".
-
For “Client ID” and “Client Secret” add the values created for the IDCS application.
-
For "Client Assertion Signature Algorithm" select “RS256”.
-
Now click “Add” to create the provider.
We are not quite done yet - the transferred groups, or at least a relevant part of them, needs to be mapped to the "ROLE_ADMINISTRATOR" role defined in Keycloak.
To do this, switch to the "Mappers" tab at the very top of the form.
You will see an empty list, in our example you already see several defined mappers.
-
In the newly created provider expand the Advanced settings section.
-
For “Scopes” add the value "openid groups email".
-
Leave all other entries as their defaults.
-
Click the Save button at the very end of the form.
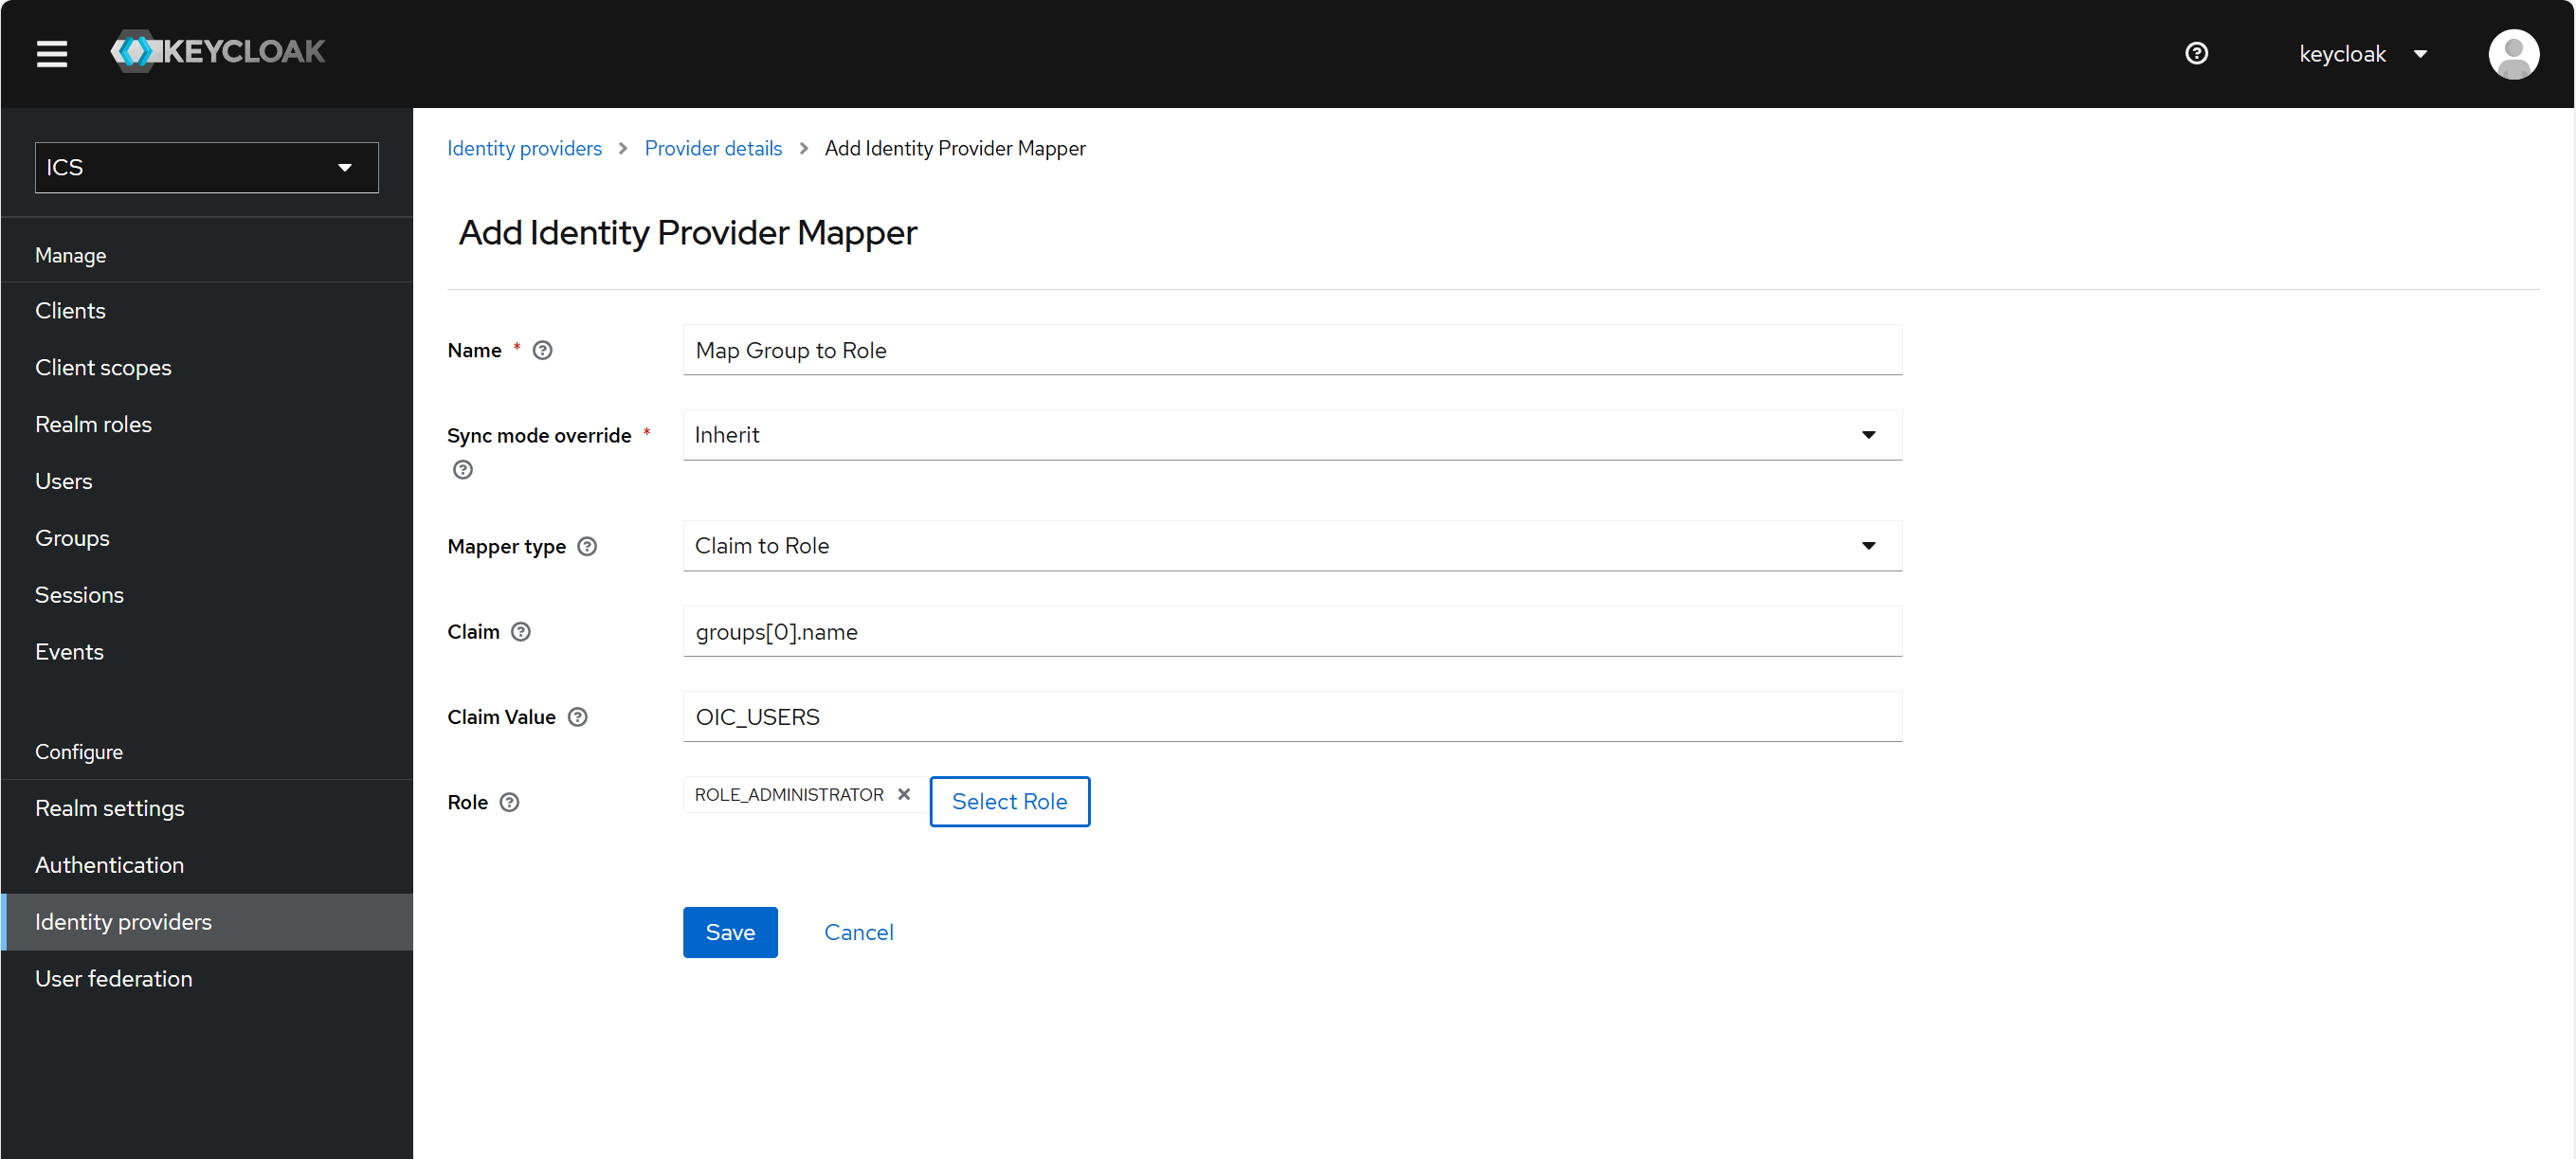
Finally you must create a role mapper. Select the mapper tab and click on the "Add mapper" button then fill in the first form as follows:
-
For “Name” set an appropriate name, e.g., “Map Group to role”
-
For “Sync Mode Override” leave the default value of "inherit".
-
For “Mapper Type” set to "Claim to Role
-
For “Claim” set the value "groups[0].name".
Explanation: the groups come from IDCS as an object array, not as an array of strings. In the object array, there is a field "name" that contains the name of the group among other fields like id and type. The selected mapper can only handle string arrays, so in multiple mappers we have to iterate through all the groups transferred and check if the selected group is the one we want to map. -
For “Claim Value” set the name of one of the groups in IDCS that your cloud user belongs to. In our example "OIC_USERS", for you it will probably be different.
-
For “Role” choose "ROLE_ADMINISTRATOR". Do not select any other role.
-
Finally save the role mapper.
You should now be able to log in to you OIC API Catalog using your Oracle IDCS users.
Conclusion
Access to your OIC API Catalog can be coupled to your existing OIC IAM domain so that users can use their existing OIC credentials.